There’s something about freshly done nails that feels instantly uplifting. A smooth, glossy finish not only looks beautiful but also adds that little boost of confidence to your everyday routine.
While regular nail polish can be lovely, it often chips within days and tends to lose its shine far too quickly. That’s where gel polish makes all the difference.
Gel nail polishes are loved for their long-lasting wear and mirror-like shine — and the best part is, you don’t need a salon appointment to enjoy them.
With a UV lamp, a good base and top coat, and your favorite shade of gel polish, it’s completely possible to achieve that salon-perfect manicure at home.
The process is straightforward once you know the right steps, and the results can last up to two to three weeks without dulling or chipping.
In this post, I have shared a step-by-step tutorial on how to do DIY gel nails at home on natural nails.
From prepping your nails to sealing in that high-gloss finish, you’ll find everything you need to create a beautiful manicure.
( This post contain affiliate links. If you make a purchase through these links, I may earn a small commission at no extra cost to you. )
So now lets get started
Step 1 Adjusting nail length :
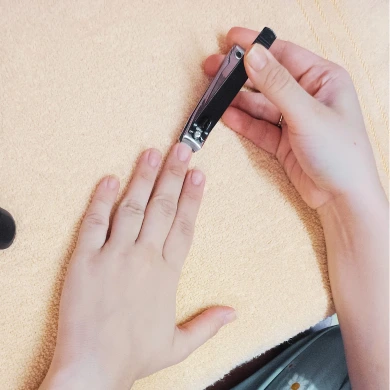
Before applying gel polish, it’s important to start with well-shaped nails. If your natural nails feel uneven or too long, gently trim them using a nail clipper to achieve your preferred length.
Keeping your nails at a manageable length not only makes them look neat but also helps the gel polish last longer without lifting or breaking.
Aim for a shape that feels comfortable for your lifestyle, whether that’s rounded, square, or slightly oval.
Step 2 Nail Filing :
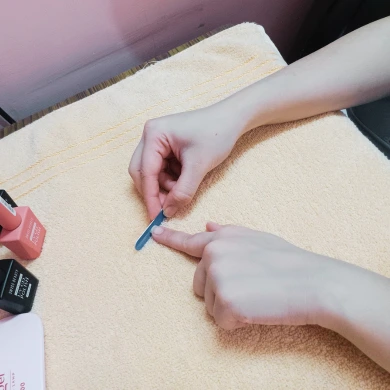
Once you trimmed your nails, the next step is shaping them with a nail filer. Filing helps to smooth out any uneven edges and you can give any nail shape like square, round, almond, or oval.
I kept mine square, but you can choose a shape that best suits your hands and personal taste. Always file in one direction rather than sawing back and forth, as this keeps the nails stronger and reduces splitting.
A neat shape gives your manicure a polished look even before the gel polish goes on.
( I used a small nail filer, that i got with a set of press on nails, I really like it, because I find it very handy ).
Step 3 Push Back Cuticles :
After shaping your nails, you need to gently push back the cuticles to create a clean surface for your gel polish.
This step helps the polish adhere better and prevents it from lifting around the edges.
You can use a cuticle pusher and apply light pressure to nudge the cuticles back without causing any discomfort.
Avoid cutting them, as cuticles protect your nails from infection.
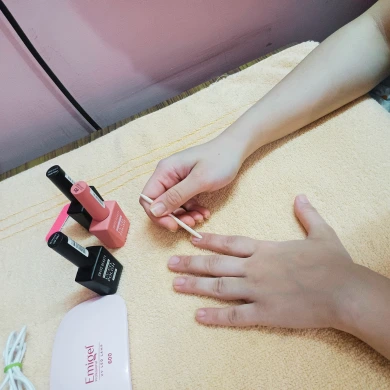
Step 4 Nail Buffing :

Buffing is an important step that a gel polish stay in place. Using the smoother, buffing side of your nail file or a nail buffer, lightly go over the surface of each nail to remove the natural shine.
The goal is not to thin out the nails, but simply to create a slightly rough surface so the gel polish can grip better.
Be gentle and use even strokes across the nail bed. Once its done, brush away or wipe off any dust so that the nails are clean and ready for the next step.
Step 5 Apply Base Coat :
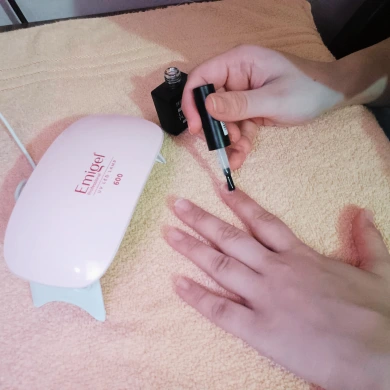
Now it’s time to begin the gel application.
Start with a thin layer of base coat — this is what helps the color stick properly and protects your natural nails underneath.
When you take the brush out of the bottle, gently swipe it along the rim to remove any excess product. A thin, even coat is always better than a thick one, as it prevents bubbling and ensures a smooth finish.
Carefully apply the base coat across the entire nail surface, sealing the tip as well, before moving on to curing.
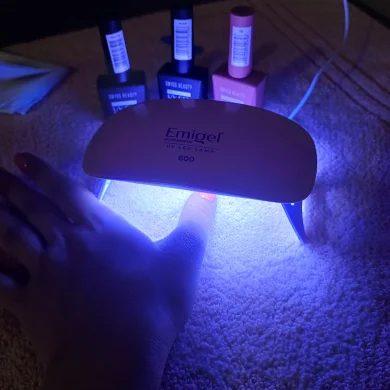
Step 6 Cure the Base Coat :

Once the base coat is applied, cure it under your UV lamp. The curing time can vary depending on the strength of your lamp — with my smaller UV lamp, it took about 70 seconds for the base coat to fully set.
If you’re using a similar lamp, giving it a little extra time ensures the gel hardens properly.
I also kept the room dim by switching off the bright light, as I read it somewhere, that gel polishes can sometimes cure more evenly in a darker environment.
After curing, the nails are ready for color.
Step 7 Apply the First Coat of Gel Polish :
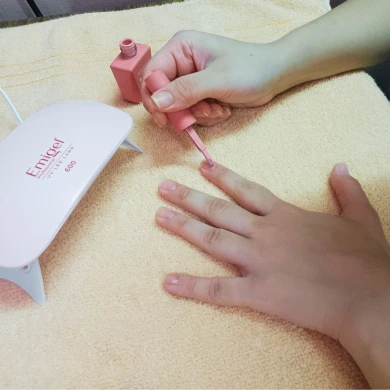
Now comes the fun part — applying your chosen color.
Start with a very thin coat of gel polish, just enough to cover the nail evenly. It’s best to gently swipe the brush against the bottle’s opening before applying, so you don’t overload it with product.
Begin near the cuticle and slowly glide the brush down to the tip, making sure to also seal the free edge.
Don’t worry if the first layer looks slightly sheer or you see the brush strokes — gel polish builds beautifully in layers. Keep it thin and neat for the smoothest result.
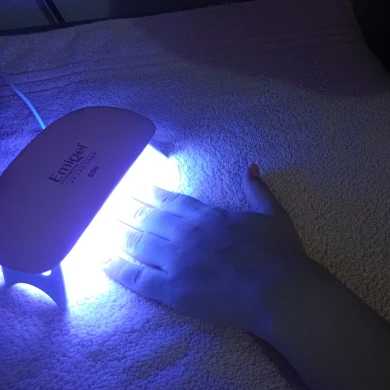
Step 8 Cure the First Coat of Gel Polish :
After applying the first thin layer of color, place your nails under the UV lamp to cure, again for 70 seconds. With smaller lamps, you won’t get that timer settings and that small screen that shows the time.
So, you need to set the time in your mobile phone. Be sure to keep your hand steady and flat so the light reaches every part of the nail.
Don’t forget to do your thumbs separately for even coverage. Once cured, the polish should feel dry to the touch but slightly tacky — this is completely normal and helps the next layer bond properly.
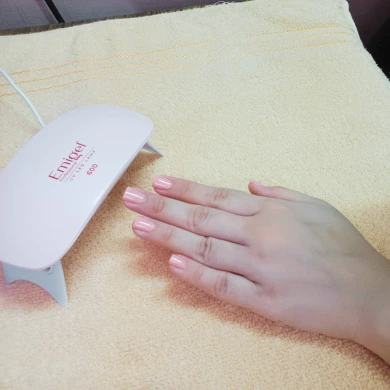
Step 9 Apply the second coat of gel polish :

For a more opaque finish, apply a second thin layer of gel polish. Just like before, remove excess product from the brush by gently swiping it along the bottle’s rim, then apply evenly from cuticle to tip.
Keep your strokes smooth and controlled, making sure the polish doesn’t flood the cuticles or sides of the nail. If you get the gel polish on the sides, make sure to gently wipe it off using a thin flat brush before curing it.
Sealing the free edge again is important, as it helps prevent early chipping. The second coat usually gives the most smooth look, without any brush strokes, giving your manicure a professional look.
Step 10 Cure the Second Coat of Gel Polish :
Once your second coat is applied, cure it under the UV lamp for the same amount of time which is 70 seconds.
Keeping your hand steady is important to avoid any uneven curing. When cured properly, your nails will still feel slightly tacky on the surface, which is completely normal at this stage.
This layer forms the perfect base for your glossy top coat.
Step 11 Apply the Top Coat :
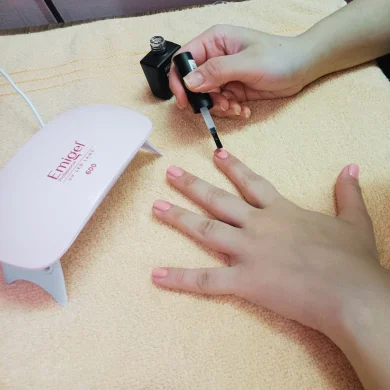
The top coat is what seals your manicure and gives it that lasting, glossy finish. Apply a thin, even layer over the cured color, making sure to cover the entire nail surface and carefully seal the free edge.
Just like with the base and color coats, less is more — a thin application prevents bubbling and helps the polish cure evenly. Also make sure to gently swipe the brush to get rid of the excess product on the bottle opening.
Take your time to apply it neatly, as this layer protects all the work you’ve done so far. Once applied, your nails are ready for their final curing session.
Step 12 Cure the Top Coat :
After applying the top coat, place your nails under the UV lamp to cure for about 70. This final curing step is what locks in the shine and ensures your manicure lasts for weeks without losing its gloss.
Make sure to keep your hand steady and your nails flat so every part is exposed to the light. Cure the thumb separately for every layer of polish you apply for 70 seconds.
Once cured, the surface of your nails may feel a little sticky — this is completely normal and will be removed in the next step.
Step 13 Wipe Off :
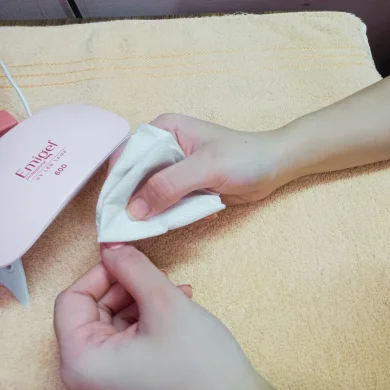
Once the top coat is cured, you may notice a slightly tacky layer on the surface of your nails. This is called the inhibition layer and it’s completely normal with most gel top coats.
To remove it, take a lint-free wipe soaked in isopropyl alcohol and gently swipe over each nail until the surface feels smooth and glossy.
Be sure to use a fresh section of the wipe for each nail so the residue doesn’t transfer back. This final step reveals the true shine of your manicure, leaving your nails perfectly finished.
Step 14 Apply Cuticle Oil :

The final step is all about care and nourishment. After your gel manicure is complete, gently massage a few drops of cuticle oil around the base of each nail.
This helps replenish any moisture lost during the process and keeps your cuticles soft and healthy. Not only does it feel soothing, but it also gives your nails that extra touch of salon-like finish.
Making cuticle oil a regular habit after manicures will keep your nails stronger and your hands looking well cared for.
Final Thoughts :
Doing gel nails at home may feel a little detailed at first, but once you get into the rhythm, it becomes a relaxing and rewarding routine.
With just a few tools and some patience, you can achieve a manicure that not only looks polished but also lasts for weeks without losing its shine.
The key is to focus on thin, even layers and proper curing — those two steps make all the difference in how your manicure wears.
What I love most about at-home gel nails is the flexibility it gives. You can choose shades that match your mood, refresh your look whenever you like, and enjoy the satisfaction of creating something salon-quality by yourself.
And with a little care, like applying cuticle oil and protecting your hands, your nails will stay healthy underneath too.
So, whether you’re preparing for a special occasion or simply treating yourself, DIY gel nails are a wonderful way to add a glossy, lasting touch of beauty to your everyday routine.
Love this guide ? Save on Pinterest

Leave a Reply
You must be logged in to post a comment.